C64 Setup and Display
Commodore 64 • Phase 1 • Tier 1
Create your first C64 assembly program with screen colors and text display
Learning Objectives
- Create your first working C64 assembly program
- Make the screen come alive with colors
- Display text that you programmed yourself
Key Concepts
C64 Setup and Display
“I made something appear on the legendary C64!”
Welcome to the magic of Commodore 64 programming! In this lesson, you’ll create your very first assembly program that brings the C64’s screen to life with colors and text. This is where your journey into the world of hardware programming begins!
The Magic You’ll Create
“Wow! I made the C64 screen come alive!”
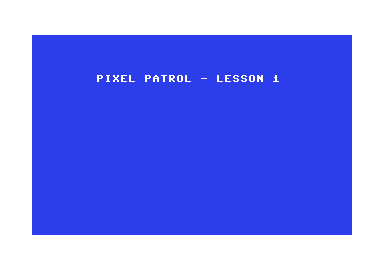
By the end of this lesson, you’ll have created a program that displays a beautiful blue screen with a white border and shows “PIXEL PATROL - LESSON 1” in the center. This might seem simple, but you’re about to experience the pure joy of direct hardware control!
How the Legends Started
“This is how every C64 programming legend began”
When legendary programmers like Jeff Minter, Andrew Braybrook, and Martin Walker first sat down at their C64s, they started exactly where you are now - making the screen respond to their commands. This simple act of changing screen colors was the first step toward creating games that would be remembered forever.
The C64’s Revolutionary Graphics
In 1982, the Commodore 64’s VIC-II chip was absolutely revolutionary. While other computers could barely display colors, the C64 could create:
- 16 beautiful colors from its custom palette
- Hardware sprites that moved independently
- Smooth scrolling that made arcade-quality games possible
- Precise timing that enabled incredible effects
Why This Matters Today
“This is how modern graphics programming works”
The concepts you’ll learn today - direct hardware control, memory-mapped registers, and color manipulation - are the foundation of:
- GPU programming and shader development
- Embedded systems programming
- Game engine development
- Real-time graphics and effects
Understanding how the C64 works will make you think like a systems programmer - someone who understands how computers really work at the hardware level.
Understanding the C64’s Magic
Before we create our first program, let’s understand the amazing hardware we’re controlling:
The VIC-II Chip - Your Graphics Powerhouse
The VIC-II (Video Interface Chip) is the heart of C64 graphics. It has special registers that you can write to directly:
- $D020: Border color register - controls the screen border
- $D021: Background color register - controls the main screen area
- $D022-$D023: Additional background colors for multicolor mode
The C64’s Beautiful Color Palette
0 = Black      8 = Orange
1 = White      9 = Brown
2 = Red        10 = Light Red
3 = Cyan       11 = Dark Gray
4 = Purple     12 = Medium Gray
5 = Green      13 = Light Green
6 = Blue       14 = Light Blue
7 = Yellow     15 = Light Gray
Memory Layout - Where Everything Lives
The C64’s 64KB of memory is carefully organized:
- $0400-$07E7: Screen memory (1000 bytes) - what characters to display
- $D800-$DBE7: Color memory (1000 bytes) - what color each character should be
- $0801: Where BASIC programs start
- $D000-$DFFF: Hardware registers (including VIC-II)
Building the Magic
Let’s create your first C64 program step by step! Each step will add a new layer of magic.
Step 1: The BASIC Stub - Making It Auto-Run
“This is how we trick the C64 into running our assembly code!”
Every C64 program needs a BASIC stub to run automatically. This creates a tiny BASIC program that jumps to your assembly code:
; BASIC stub to auto-run our program
*=$0801                        ; Start at BASIC program area

!word +                        ; Next line address
!word 10                       ; Line number 10
!byte $9e                      ; SYS token
!text " 2064"                  ; Space + address as text
!byte 0                        ; End of line
+ !word 0                      ; End of BASIC program
This creates: 10 SYS 2064 - a BASIC program that jumps to our assembly code!
Step 2: Setting Colors - Talking to the VIC-II
“This is where the magic happens - direct hardware control!”
*=$0810                        ; Start at decimal 2064

main:
        ; Set border color to white
        lda #$01               ; Load white color (1)
        sta $d020              ; Store in VIC-II border register

        ; Set background color to blue
        lda #$06               ; Load blue color (6)
        sta $d021              ; Store in VIC-II background register
Magic Moment: When you run this, the screen border becomes white and the background becomes blue! You’re directly controlling the VIC-II chip!
Step 3: Clearing the Screen - Making It Beautiful
“Let’s make sure our screen is perfectly clean!”
        ; Clear screen with spaces
        ldx #0                 ; Start at position 0
clear_screen:
        lda #$20               ; Space character
        sta $0400,x            ; Store in screen memory
        sta $0500,x            ; Store in screen memory page 2
        sta $0600,x            ; Store in screen memory page 3
        sta $0700,x            ; Store in screen memory page 4

        ; Set character colors to white
        lda #$01               ; White color
        sta $d800,x            ; Store in color memory
        sta $d900,x            ; Store in color memory page 2
        sta $da00,x            ; Store in color memory page 3
        sta $db00,x            ; Store in color memory page 4

        inx                    ; Next position
        bne clear_screen       ; Continue until X wraps to 0
Magic Moment: The screen is now perfectly clear with white text on blue background!
Step 4: Displaying Text - Your First Message
“Now let’s make the C64 display our message!”
        ; Display title text
        ldx #0                 ; Start at position 0
display_title:
        lda title_text,x       ; Load character from title
        beq title_done         ; If zero, we're done
        sta $0400 + 40*5 + 8,x ; Store at row 5, column 8
        inx                    ; Next character
        jmp display_title      ; Continue
title_done:

        ; Infinite loop - keep program running
endless_loop:
        jmp endless_loop

; Our text data using screen codes
title_text:
        !byte 16,9,24,5,12,32,16,1,20,18,15,12,32,45,32,12,5,19,19,15,14,32,49
        !byte 0                ; Null terminator
Magic Moment: “PIXEL PATROL - LESSON 1” appears on the screen in white text! You’ve just programmed the C64 to display your message!
Create Your Own Magic
Now it’s your turn! Let’s build this amazing program together.
Build It Yourself
- Create the file: Save the complete code as
pixel-patrol-01.asm - Build the program: Run
make clean && make all - Run the magic: Execute
make run
Expected Wonder
When you run this program, you should see:
- A beautiful blue background filling the screen
- A crisp white border around the screen
- “PIXEL PATROL - LESSON 1” displayed in the center
- The satisfaction of “I made the C64 do exactly what I wanted!”
Make It Even More Amazing
Try these variations to explore the C64’s capabilities:
Challenge 1: Rainbow Colors
Wonder Goal: “I can make any color combination!”
Try different color values:
- Change
#$06to#$02for a red background - Change
#$01to#$07for a yellow border - Experiment with all 16 colors!
Challenge 2: Move the Text
Wonder Goal: “I can put text anywhere I want!”
Change the text position by modifying:
sta $0400 + 40*5 + 8,x ; Row 5, Column 8
Try:
40*10 + 10for row 10, column 1040*20 + 5for row 20, column 5
Challenge 3: Custom Message
Wonder Goal: “I can make the C64 say anything!”
Create your own message using screen codes:
- A-Z: 1-26
- 0-9: 48-57
- Space: 32
What You’ve Achieved
🎉 Congratulations! You’ve just created your first C64 assembly program!
The Magic You Mastered
- ✨ Direct hardware control - You commanded the VIC-II chip
- ✨ Color manipulation - You painted the screen with your choice of colors
- ✨ Text display - You made the C64 show your message
- ✨ Memory management - You organized screen and color memory
- ✨ Assembly programming - You wrote real 6502 machine code
Your Programming Journey
You’ve just taken your first step into the world of systems programming. This is how every legendary C64 programmer began - with a simple program that made the screen come alive!
Historical Achievement
You’ve just done what thousands of bedroom coders did in the 1980s when they first discovered the power of assembly programming. You’re walking in the footsteps of the pioneers who created the games that defined a generation!
Modern Skills
The skills you learned today - direct hardware control, memory mapping, and systems thinking - are used in:
- Game engine development (Unity, Unreal Engine)
- Embedded systems (Arduino, Raspberry Pi)
- Graphics programming (OpenGL, DirectX, Vulkan)
- Performance optimization in any language
What’s Next?
“Ready to bring your first sprite to life?”
In the next lesson, you’ll discover how to create and control hardware sprites - the secret weapon that made C64 games look so smooth and professional. If you thought changing colors was exciting, wait until you see a sprite appear and move on command!
Coming Up
- Create your first hardware sprite
- Make it appear at any position on screen
- Control it with the joystick
- Experience the thrill of real-time interactive graphics
You’re about to unlock the C64’s most powerful graphics feature - the legendary hardware sprites that made games like Impossible Mission, Paradroid, and Turrican possible!
Ready to experience even more magic? Let’s create your first sprite!
Technical Reference
6502 Instructions Used
- LDA #value: Load accumulator with immediate value
- STA address: Store accumulator in memory
- LDX #value: Load X register with immediate value
- INX: Increment X register
- BNE label: Branch if not equal (not zero)
- BEQ label: Branch if equal (zero)
- JMP label: Jump unconditionally
VIC-II Registers
- $D020: Border color (0-15)
- $D021: Background color (0-15)
Memory Map
- $0400-$07E7: Screen memory (1000 bytes)
- $D800-$DBE7: Color memory (1000 bytes)
- $0801: BASIC program start
- $0810: Our assembly code (2064 decimal)
Screen Codes
Screen codes are different from ASCII/PETSCII:
- A-Z: 1-26
- 0-9: 48-57
- Space: 32
- Special characters: Various codes
This foundation will serve you well as we build increasingly amazing programs throughout your C64 journey!