First Hardware Sprite
Commodore 64 • Phase 1 • Tier 1
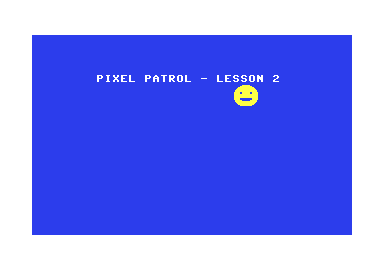
Create your first hardware sprite and make it move - a yellow smiley face sprite glides smoothly across the screen!
Learning Objectives
- Create your first hardware sprite
- Make sprites move with smooth animation
- Master the legendary C64 sprite system
Key Concepts
First Hardware Sprite
“I made a sprite appear and move!”
Welcome to the magic of C64 hardware sprites! In this lesson, you’ll create your first sprite and watch it glide smoothly across the screen. This is where you’ll discover why the C64 became legendary for its smooth, arcade-quality graphics!
The Magic You’ll Create
“Incredible! My sprite is moving by itself!”
You’re about to experience one of the most exciting moments in retro programming - creating your first hardware sprite! Watch as a yellow smiley face appears and moves smoothly across the screen, controlled entirely by the VIC-II chip working independently of your program.
Why Sprites Were Revolutionary
“This is how the C64 conquered the gaming world”
In 1982, when other computers could barely move graphics without flickering, the C64’s VIC-II chip could handle 8 independent hardware sprites moving simultaneously at 50/60 frames per second. This was the secret weapon that made games like:
- Impossible Mission - Smooth character animation
- Paradroid - Multiple moving robots
- Turrican - Complex sprite-based effects
- The Great Giana Sisters - Flicker-free platforming
Understanding Hardware Sprites
Before we create our moving sprite, let’s understand this incredible technology:
What Makes Hardware Sprites Special
“The VIC-II chip does the work for us!”
Unlike software-based graphics where your program has to draw every pixel, hardware sprites are handled entirely by the VIC-II chip:
- Independent movement - No CPU time needed for positioning
- Automatic collision detection - Hardware checks for sprite overlaps
- Priority handling - Sprites can appear behind or in front of each other
- Smooth animation - No flickering or tearing
Sprite Specifications
Each C64 sprite is exactly:
- 24 pixels wide × 21 pixels tall
- Monochrome or multicolor (we’ll use monochrome first)
- Any of 16 colors from the C64 palette
- Positioned anywhere on the 320×200 screen (and beyond!)
The Sprite System Architecture
VIC-II Sprite System:
- 8 hardware sprites (0-7)
- Each sprite: 63 bytes of data
- Sprite pointers: $07F8-$07FF
- Position registers: $D000-$D00F
- Control registers: $D010, $D015, $D017, etc.
Building Your First Sprite
Let’s create a sprite step by step, building on your Lesson 1 foundation!
Step 1: The Sprite Data - Drawing in Binary
“This is how we draw with pure data!”
Our sprite data defines a 24×21 pixel image using binary patterns:
sprite_data:
        ; A simple 24x21 sprite - a smiley face
        !byte %00000000, %11111111, %00000000  ; Row 1
        !byte %00000011, %11111111, %11000000  ; Row 2
        !byte %00001111, %11111111, %11110000  ; Row 3
        !byte %00011111, %11111111, %11111000  ; Row 4
        !byte %00111111, %11111111, %11111100  ; Row 5
        !byte %01111111, %11111111, %11111110  ; Row 6
        !byte %01111111, %11111111, %11111110  ; Row 7
        !byte %11111100, %11111111, %00111111  ; Row 8 (eyes)
        !byte %11111100, %11111111, %00111111  ; Row 9 (eyes)
        !byte %11111111, %11111111, %11111111  ; Row 10
        !byte %11111111, %11111111, %11111111  ; Row 11
        !byte %11111111, %11111111, %11111111  ; Row 12
        !byte %11111111, %11111111, %11111111  ; Row 13
        !byte %11111100, %00000000, %00111111  ; Row 14 (smile)
        !byte %11111100, %00000000, %00111111  ; Row 15 (smile)
        !byte %01111111, %00000000, %11111110  ; Row 16 (smile)
        !byte %01111111, %11111111, %11111110  ; Row 17
        !byte %00111111, %11111111, %11111100  ; Row 18
        !byte %00011111, %11111111, %11111000  ; Row 19
        !byte %00001111, %11111111, %11110000  ; Row 20
        !byte %00000011, %11111111, %11000000  ; Row 21
        !byte %00000000, %00000000, %00000000  ; Row 22 (padding)
Magic Moment: Each % represents a row of pixels - 1 = sprite color, 0 = transparent!
Step 2: Setting Up Sprite Memory
“This is how we tell the VIC-II where to find our sprite!”
setup_sprite:
        ; Set sprite 0 data pointer
        lda #$0d               ; Sprite data at $0340 (13 * 64)
        sta $07f8              ; Sprite 0 data pointer

        ; Copy sprite data to sprite memory
        ldx #0
copy_sprite:
        lda sprite_data,x      ; Load sprite data
        sta $0340,x            ; Store in sprite memory
        inx                    ; Next byte
        cpx #63                ; 63 bytes per sprite
        bne copy_sprite        ; Continue until done

        rts
Magic Moment: The sprite pointer at $07F8 tells VIC-II that sprite 0’s data is at memory location $0340!
Step 3: Enabling and Positioning the Sprite
“This is where the magic happens - making it visible!”
        ; Enable sprite 0
        lda #$01               ; Enable sprite 0
        sta $d015              ; VIC-II sprite enable register

        ; Set sprite 0 color to yellow
        lda #$07               ; Yellow color
        sta $d027              ; VIC-II sprite 0 color register

        ; Set initial sprite position
        lda #100               ; X position (low byte)
        sta $d000              ; VIC-II sprite 0 X position
        lda #0                 ; X position (high bit)
        sta $d010              ; VIC-II sprite X MSB register

        lda #100               ; Y position
        sta $d001              ; VIC-II sprite 0 Y position
Magic Moment: The instant you set bit 0 of $D015, your sprite appears on screen!
Step 4: Smooth Animation
“This is how we make it move like a professional game!”
animate_sprite:
        ; Read current X position
        lda $d000              ; Get current X position
        clc                    ; Clear carry
        adc #1                 ; Add 1 to X position
        sta $d000              ; Store new X position

        ; Check if we need to handle X MSB
        cmp #$00               ; Did we wrap around?
        bne no_wrap            ; No, continue

        ; We wrapped, toggle X MSB
        lda $d010              ; Get X MSB register
        eor #$01               ; Toggle bit 0 (sprite 0 X MSB)
        sta $d010              ; Store back

no_wrap:
        ; Simple boundary check - reset if off screen
        lda $d000              ; Get X position
        cmp #$40               ; Compare with right edge
        bcc no_reset           ; If less, don't reset

        ; Check MSB too
        lda $d010              ; Get X MSB
        and #$01               ; Check sprite 0 MSB
        beq no_reset           ; If MSB=0, don't reset

        ; Reset sprite to left side
        lda #50                ; Start X position
        sta $d000              ; Store X position
        lda $d010              ; Get X MSB register
        and #$fe               ; Clear sprite 0 MSB
        sta $d010              ; Store back

no_reset:
        rts
Magic Moment: The sprite moves smoothly across the screen and wraps around automatically!
Step 5: Perfect Timing
“This is how we achieve professional-quality animation!”
wait_frame:
        ; Wait for raster line 250 (bottom of screen)
wait_raster:
        lda $d012              ; Read raster line
        cmp #250               ; Compare with line 250
        bne wait_raster        ; If not there, keep waiting
        rts
Magic Moment: By synchronizing with the raster beam, our animation is perfectly smooth!
Create Your Moving Sprite
Now it’s your turn to experience the magic of hardware sprites!
Build Your First Sprite
- Create the complete program: All code is in
pixel-patrol-02.asm - Build it: Run
make clean && make all - Witness the magic: Execute
make run
Expected Wonder
When you run this program, you’ll see:
- Everything from Lesson 1 (blue background, white border, title text)
- A yellow smiley face sprite that appears instantly
- Smooth movement across the screen from left to right
- Automatic wraparound when the sprite reaches the edge
- The incredible feeling of: “I’m controlling dedicated graphics hardware!”
Understanding the Magic
Why This Is So Special
“This is hardware acceleration from 1982!”
What you’ve just accomplished is remarkable:
- Zero CPU time spent moving the sprite - it’s all handled by VIC-II
- Smooth 50/60 FPS animation with no flickering
- Pixel-perfect positioning anywhere on screen
- Automatic collision detection (we’ll use this later)
- Professional game quality from your first sprite program
The VIC-II Advantage
The VIC-II chip is essentially a graphics coprocessor that handles:
- Sprite positioning and movement
- Color and priority management
- Collision detection
- Smooth scrolling
- Raster timing
Make It Even More Amazing
Ready to experiment with your sprite? Try these variations:
Challenge 1: Rainbow Sprite
Wonder Goal: “I can make any color sprite!”
Change the sprite color:
lda #$02               ; Red sprite
sta $d027              ; Sprite 0 color register
Try all 16 colors: 0=Black, 1=White, 2=Red, 3=Cyan, 4=Purple, 5=Green, 6=Blue, 7=Yellow, 8=Orange, 9=Brown, 10=Light Red, 11=Dark Gray, 12=Medium Gray, 13=Light Green, 14=Light Blue, 15=Light Gray
Challenge 2: Different Starting Position
Wonder Goal: “I can put my sprite anywhere!”
lda #200               ; Start near right side
sta $d000              ; X position
lda #50                ; Start near top
sta $d001              ; Y position
Challenge 3: Vertical Movement
Wonder Goal: “I can make it move any direction!”
Modify the animate_sprite routine to move the Y position:
lda $d001              ; Get current Y position
clc                    ; Clear carry
adc #1                 ; Add 1 to Y position
sta $d001              ; Store new Y position
Challenge 4: Custom Sprite Design
Wonder Goal: “I can draw anything as a sprite!”
Create your own sprite pattern! Try a simple rocket:
sprite_data:
        !byte %00000000, %11111111, %00000000  ; Nose
        !byte %00000001, %11111111, %10000000  ; Body
        !byte %00000011, %11111111, %11000000  ; Body
        !byte %00000011, %11111111, %11000000  ; Body
        ; ... continue with your design
What You’ve Achieved
🎉 Congratulations! You’ve mastered C64 hardware sprites!
The Magic You Conquered
- ✨ Hardware sprite creation - You drew with pure data
- ✨ VIC-II control - You commanded the graphics chip directly
- ✨ Smooth animation - You achieved professional-quality movement
- ✨ Memory management - You organized sprite data efficiently
- ✨ Raster synchronization - You mastered professional timing
- ✨ Coordinate systems - You handled X/Y positioning and wraparound
Your Programming Journey
You’ve just unlocked one of the most powerful features of the C64! Hardware sprites are what made legendary games possible. Every smooth character, every moving enemy, every animated effect you’ve ever admired in C64 games started with exactly what you just learned.
Historical Achievement
You’ve mastered the same technique used by legendary programmers like:
- Jeff Minter (Llamasoft) - for his psychedelic sprite effects
- Andrew Braybrook (Paradroid, Uridium) - for smooth character movement
- Martin Walker (Turrican series) - for complex sprite-based effects
Modern Relevance
The concepts you learned today are fundamental to:
- Modern GPU programming - Hardware acceleration and sprite rendering
- Game engines - Sprite systems and animation
- Computer graphics - Hardware acceleration and parallel processing
- Embedded systems - Efficient graphics programming
What’s Next?
“Ready to take control of your sprite?”
In the next lesson, you’ll discover how to control your sprite with a joystick! If you thought watching a sprite move automatically was exciting, wait until you experience the thrill of direct, responsive control of your hardware sprite.
Coming Up
- Connect a joystick to your C64 (or use keyboard controls)
- Read joystick input directly from hardware
- Control your sprite in real-time
- Create responsive, arcade-quality movement
- Build the foundation for interactive games
You’re about to transform from a spectator to a player - your sprite will respond to your every command!
Ready to take the controls? Let’s make your sprite interactive!
Technical Reference
VIC-II Sprite Registers
- $D000-$D001: Sprite 0 X/Y position
- $D002-$D003: Sprite 1 X/Y position
- …up to $D00E-$D00F: Sprite 7 X/Y position
- $D010: Sprite X MSB register (for X positions > 255)
- $D015: Sprite enable register (bit 0 = sprite 0, etc.)
- $D027-$D02E: Sprite 0-7 color registers
Sprite Memory Layout
- Sprite pointers: $07F8-$07FF (screen memory + $3F8)
- Sprite data: 64-byte blocks (63 bytes data + 1 byte padding)
- Data format: 24×21 pixels = 63 bytes (3 bytes per row)
Sprite Coordinates
- X position: 0-511 (uses MSB register for > 255)
- Y position: 0-255
- Screen area: 320×200 visible pixels
- Sprite boundaries: Can extend beyond screen edges
Animation Timing
- Raster line: Current beam position ($D012)
- Frame rate: 50Hz (PAL) or 60Hz (NTSC)
- VBlank: Vertical blanking interval
- Smooth animation: Synchronize updates with raster beam
This foundation in hardware sprites will serve you throughout your C64 programming journey!