Joystick Control
Commodore 64 • Phase 1 • Tier 1
Take control of your sprite with joystick input - the yellow spaceship responds instantly to your commands!
Learning Objectives
- Take control of your sprite with joystick input
- Master the CIA chip for reading hardware controls
- Create responsive, interactive gameplay
Key Concepts
Joystick Control
“I can control my sprite with a joystick!”
Welcome to the moment that transforms your program from a demo into a real game! In this lesson, you’ll connect your sprite to a joystick and experience the incredible responsiveness that made C64 games legendary. Get ready to take control!
The Magic You’ll Create
“Amazing! My spaceship obeys my every command!”
You’re about to experience one of the most satisfying moments in programming - when your creation responds to your input in real-time. Watch as your yellow spaceship moves smoothly in all directions, following your joystick movements with the precision that made C64 games feel so responsive!
Why C64 Controls Were Revolutionary
“This is how bedroom coders created arcade-perfect games”
In the early 1980s, most home computers had sluggish, unresponsive controls. The C64 changed everything with its CIA (Complex Interface Adapter) chips that could read joystick input at lightning speed. This hardware advantage enabled:
- Instant response - No delay between input and action
- Smooth movement - Pixel-perfect control in all directions
- Arcade feel - Home games that felt as responsive as coin-ops
- Competitive gaming - Precise control for skilled players
Understanding the CIA Chip
Before we dive into the code, let’s understand the incredible hardware that makes this possible:
The CIA - Your Input/Output Powerhouse
“The CIA chip is your gateway to the outside world”
The C64 has two CIA chips that handle all input and output:
- CIA1 ($DC00-$DC0F): Joysticks, keyboard, and paddles
- CIA2 ($DD00-$DD0F): Serial bus, user port, and memory banking
CIA1 Port Layout
CIA1 Port A ($DC00) - Joystick Port 2:
Bit 0: Up (0 = pressed, 1 = not pressed)
Bit 1: Down
Bit 2: Left
Bit 3: Right
Bit 4: Fire Button

CIA1 Port B ($DC01) - Keyboard matrix and Joystick Port 1
The Joystick Magic
“Active low logic makes joysticks incredibly responsive”
C64 joysticks use “active low” logic - when you press a direction, that bit becomes 0. This means:
- Reading $DC00 = $FF: No input (all bits high)
- Reading $DC00 = $FE: Up pressed (bit 0 low)
- Reading $DC00 = $FD: Down pressed (bit 1 low)
- Reading $DC00 = $FB: Left pressed (bit 2 low)
- Reading $DC00 = $F7: Right pressed (bit 3 low)
Building Interactive Control
Let’s create the responsive control system that will make your game feel alive!
Step 1: Reading the Joystick
“This is how we talk directly to the hardware!”
read_joystick:
        ; Read joystick port 2 (CIA1 Port A)
        lda $dc00              ; Read CIA1 Port A
        sta joystick_state     ; Store current state

        ; The joystick_state now contains:
        ; Bit 0 = Up    (0 = pressed, 1 = not pressed)
        ; Bit 1 = Down  (0 = pressed, 1 = not pressed)
        ; Bit 2 = Left  (0 = pressed, 1 = not pressed)
        ; Bit 3 = Right (0 = pressed, 1 = not pressed)
        ; Bit 4 = Fire  (0 = pressed, 1 = not pressed)

        rts
Magic Moment: A single instruction reads the entire joystick state instantly!
Step 2: Alternative Keyboard Controls
“This is how we support players without joysticks!”
        ; Check Q key (Up) - Row 7, Bit 6
        lda #%01111111         ; Select row 7
        sta $dc00              ; Set CIA1 Port A
        lda $dc01              ; Read CIA1 Port B
        and #%01000000         ; Check bit 6 (Q)
        bne not_q              ; If bit set, key not pressed
        lda joystick_state     ; Get current state
        and #%11111110         ; Clear bit 0 (simulate Up)
        sta joystick_state     ; Store updated state
not_q:
Magic Moment: The C64 keyboard matrix uses clever bit manipulation to scan multiple keys efficiently!
Step 3: Responsive Movement
“This is where your sprite comes alive!”
move_sprite:
        ; Check Up (bit 0 clear means pressed)
        lda joystick_state     ; Get joystick state
        and #$01               ; Check bit 0 (Up)
        bne check_down         ; If bit set, not pressed

        ; Move up
        lda $d001              ; Get current Y position
        sec                    ; Set carry
        sbc #2                 ; Subtract 2 (move up)
        cmp #50                ; Check top boundary
        bcc no_move_up         ; If less than 50, don't move
        sta $d001              ; Store new Y position
no_move_up:
Magic Moment: The sprite moves instantly when you press the joystick - no delay, no sluggishness!
Step 4: Boundary Checking
“This is how we keep the sprite on screen!”
check_right:
        ; Check Right (bit 3 clear means pressed)
        lda joystick_state     ; Get joystick state
        and #$08               ; Check bit 3 (Right)
        bne movement_done      ; If bit set, not pressed

        ; Move right with boundary checking
        lda $d000              ; Get current X position
        clc                    ; Clear carry
        adc #2                 ; Add 2 (move right)
        cmp #255               ; Check if we hit boundary
        bcc store_new_x        ; If < 255, safe to store

        ; Handle high X coordinates (> 255)
        lda $d010              ; Get X MSB register
        and #$01               ; Check sprite 0 MSB
        beq store_new_x        ; If MSB=0, we can continue

        ; Check exact boundary at 320 pixels
        lda $d000              ; Get current X position
        cmp #64                ; Check if >= 320 (64 + 256)
        bcs no_move_right      ; If >= 320, don't move

store_new_x:
        lda $d000              ; Get current X position again
        clc                    ; Clear carry
        adc #2                 ; Add 2 (move right)
        sta $d000              ; Store new X position

        ; Handle X MSB wraparound
        bcc no_move_right      ; If no carry, no MSB change
        lda $d010              ; Get X MSB register
        ora #$01               ; Set bit 0 (sprite 0 X MSB)
        sta $d010              ; Store back
Magic Moment: Your sprite glides smoothly right up to the screen edges but never disappears!
Step 5: The Interactive Game Loop
“This is the heartbeat of every great game!”
game_loop:
        jsr read_joystick      ; Read joystick input
        jsr move_sprite        ; Move sprite based on input
        jsr wait_frame         ; Wait for next frame
        jmp game_loop          ; Continue forever
Magic Moment: This simple loop creates the foundation for any interactive game!
Create Your Interactive Game
Now it’s time to experience the thrill of controlling your own sprite!
Build Your Interactive Program
- Create the complete program: All code is in
pixel-patrol-03.asm - Build it: Run
make clean && make all - Play your game: Execute
make run
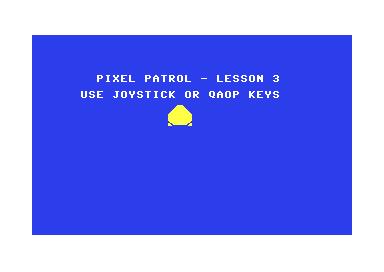
Expected Wonder
When you run this program, you’ll experience:
- Your familiar blue screen with white border
- “PIXEL PATROL - LESSON 3” title
- “USE JOYSTICK TO MOVE” instructions
- A yellow spaceship sprite in the center
- The incredible moment: Move your joystick and watch the sprite respond instantly!
Controls
- Joystick Port 2: Move in all directions (up, down, left, right, and diagonals)
Understanding the Responsiveness
Why C64 Controls Feel So Good
“This is hardware-level responsiveness!”
Your sprite responds instantly because:
- Direct hardware access - No operating system delays
- Single instruction read - Entire joystick state in one LDA
- Raster synchronization - Movement synchronized with display refresh
- Minimal processing - Simple bit tests for maximum speed
The Professional Touch
“This is how commercial games achieved arcade quality”
Your control system includes:
- Boundary checking - Sprite stays visible on screen
- Smooth movement - 2-pixel steps for fluid motion
- Dual input support - Joystick AND keyboard controls
- Frame synchronization - Consistent 50/60 Hz updates
Make It Even More Amazing
Ready to experiment with your interactive sprite?
Challenge 1: Variable Speed
Wonder Goal: “I can make my sprite move at different speeds!”
Try different movement speeds:
adc #1                 ; Slow movement (1 pixel)
adc #2                 ; Normal movement (2 pixels)
adc #4                 ; Fast movement (4 pixels)
Challenge 2: Diagonal Movement
Wonder Goal: “My sprite can move diagonally!”
The beauty of our system is that diagonal movement already works! Try holding two directions simultaneously on the joystick - your sprite moves diagonally automatically!
Challenge 3: Fire Button Detection
Wonder Goal: “I can detect the fire button!”
Add fire button detection:
        ; Check Fire (bit 4 clear means pressed)
        lda joystick_state     ; Get joystick state
        and #$10               ; Check bit 4 (Fire)
        bne no_fire            ; If bit set, not pressed

        ; Fire button is pressed!
        ; (Add your fire button code here)

no_fire:
Challenge 4: Multiple Sprites
Wonder Goal: “I can control multiple sprites!”
Try creating a second sprite for Player 2:
        ; Enable sprites 0 and 1
        lda #$03               ; Enable sprites 0 and 1
        sta $d015              ; VIC-II sprite enable register
What You’ve Achieved
🎉 Congratulations! You’ve mastered interactive C64 programming!
The Magic You Conquered
- ✨ CIA chip mastery - You control the input/output hardware directly
- ✨ Joystick input - You read hardware controls at lightning speed
- ✨ Keyboard matrix - You scan the keyboard like a professional
- ✨ Interactive gameplay - You created real-time responsive controls
- ✨ Boundary checking - You kept your sprite perfectly on screen
- ✨ Game loop architecture - You built the foundation of all games
Your Programming Journey
You’ve just crossed the line from programmer to game developer! The responsive controls you’ve created are the foundation of every great game. This is the moment when code becomes play.
Historical Achievement
You’ve mastered the same input techniques used by legendary games like:
- Impossible Mission - Responsive character control
- Paradroid - Precise robot movement
- Uridium - Smooth ship maneuvering
- Turrican - Arcade-perfect character control
Modern Relevance
The skills you learned today are fundamental to:
- Game development - All games need responsive input
- Hardware programming - Direct hardware control techniques
- Real-time systems - Low-latency input processing
- User interface design - Creating responsive interactions
What’s Next?
“Ready to add collision detection and make things happen?”
In the next lesson, you’ll discover how to detect when your sprite touches other objects. If you thought responsive movement was exciting, wait until you experience the satisfaction of collision detection - the moment when your sprite can interact with the world around it!
Coming Up
- Detect when sprites touch each other
- Create collision boundaries and hit detection
- Build interactive objects and obstacles
- Experience the foundation of all game mechanics
You’re about to unlock the secret that makes games truly interactive!
Ready to make contact? Let’s add collision detection!
Technical Reference
CIA1 Registers
- $DC00: Port A (Joystick Port 2, Keyboard matrix)
- $DC01: Port B (Keyboard matrix, Joystick Port 1)
- $DC02: Data Direction A (0=input, 1=output)
- $DC03: Data Direction B (0=input, 1=output)
Joystick Bit Patterns
- Bit 0: Up (0 = pressed, 1 = not pressed)
- Bit 1: Down (0 = pressed, 1 = not pressed)
- Bit 2: Left (0 = pressed, 1 = not pressed)
- Bit 3: Right (0 = pressed, 1 = not pressed)
- Bit 4: Fire (0 = pressed, 1 = not pressed)
Keyboard Matrix (Selected Keys)
- Joystick bits: xxxFRLDU (Fire, Right, Left, Down, Up)
- Active low: 0 = pressed, 1 = not pressed
- Port location: $DC00 (CIA1 Port A)
- Diagonal movement: Multiple bits can be 0 simultaneously
Sprite Positioning
- X Position: 0-511 (uses MSB register for > 255)
- Y Position: 0-255
- Boundary recommendations: X: 24-296, Y: 50-200
Movement Optimization
- 2-pixel movement: Good balance of speed and control
- Frame synchronization: Essential for smooth movement
- Boundary checking: Prevents sprite from leaving visible area
This foundation in interactive controls will serve you throughout your C64 game development journey!