Basic Sprite Movement
Commodore 64 • Phase 1 • Tier 1
Make your sprite respond to joystick input and move around the screen
Learning Objectives
- Read joystick input from hardware
- Move sprites in response to player input
- Create smooth, responsive movement
- Experience the joy of interactive control
Key Concepts
Basic Sprite Movement
“I can control it! My sprite moves exactly where I want!”
Welcome to the moment when your C64 creation becomes truly interactive! In this lesson, you’ll experience the pure joy of controlling your sprite with the joystick. This is where programming becomes a game!
The Magic You’ll Create
“Incredible! It responds to my every move!”
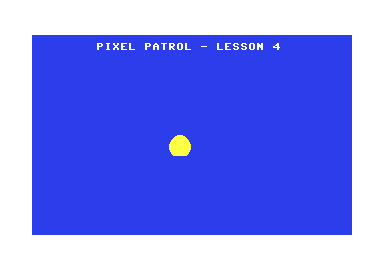
By the end of this lesson, you’ll have a sprite that moves smoothly around the screen in response to your joystick input. Watch as your yellow sprite glides through the blue background, following your commands perfectly!
Why This Feels So Good
“This is the moment when code becomes alive!”
There’s something magical about the first time you control a sprite with a joystick. It’s the moment when:
- Your code responds to your actions in real-time
- The sprite becomes your character on screen
- Programming transforms from abstract to interactive
- You feel the power of real-time control
This is the same feeling that millions of C64 users experienced when they first played games like Impossible Mission, Jumpman, or Paradroid!
Understanding Interactive Control
Before we dive into the code, let’s understand what makes this so special:
The Input-Response Loop
Your Input → Hardware → Your Code → Sprite Movement → Screen Update
    ↓            ↓           ↓              ↓              ↓
 Joystick    CIA Chip   Movement      VIC-II Sprite    Visual
  Press      Reading    Calculation    Registers      Feedback
The C64’s Interactive Magic
The C64 was designed for responsive interaction:
- CIA chip reads joystick input instantly
- VIC-II chip updates sprite position in real-time
- 6502 processor handles the logic between them
- Perfect timing creates smooth, responsive movement
Building Interactive Movement
Let’s build your interactive sprite step by step!
Step 1: The Joystick Reading Magic
“This is how we capture your intentions!”
read_joystick:
        ; Read joystick port 2 (CIA1 Port A)
        lda $dc00              ; Read CIA1 Port A
        sta joystick_state     ; Store current state

        ; The bits are "active low" - 0 means pressed
        ; Bit pattern: xxxFRLDU (Fire, Right, Left, Down, Up)

        rts
Magic Moment: The CIA chip at $DC00 instantly tells you which direction the joystick is pointing!
Step 2: Converting Input to Movement
“This is where intention becomes action!”
move_sprite:
        ; Check Up (bit 0 clear means pressed)
        lda joystick_state
        and #$01               ; Isolate bit 0
        bne check_down         ; If not 0, button not pressed

        ; Move up
        lda sprite_y
        sec                    ; Set carry for subtraction
        sbc #2                 ; Move 2 pixels up
        sta sprite_y

check_down:
        ; Check Down (bit 1 clear means pressed)
        lda joystick_state
        and #$02               ; Isolate bit 1
        bne check_left         ; If not 0, button not pressed

        ; Move down
        lda sprite_y
        clc                    ; Clear carry for addition
        adc #2                 ; Move 2 pixels down
        sta sprite_y
Magic Moment: Your sprite position variables change based on your joystick input!
Step 3: Four-Way Movement
“This is how we achieve complete control!”
check_left:
        ; Check Left (bit 2 clear means pressed)
        lda joystick_state
        and #$04
        bne check_right

        ; Move left
        lda sprite_x
        sec
        sbc #2                 ; Move 2 pixels left
        sta sprite_x

check_right:
        ; Check Right (bit 3 clear means pressed)
        lda joystick_state
        and #$08
        bne move_done

        ; Move right
        lda sprite_x
        clc
        adc #2                 ; Move 2 pixels right
        sta sprite_x

move_done:
        rts
Magic Moment: Your sprite can now move in all four directions!
Step 4: Updating the Hardware
“This is where your calculations become visible!”
update_sprite_position:
        ; Set sprite X position
        lda sprite_x
        sta $d000              ; Sprite 0 X position

        ; Set sprite Y position
        lda sprite_y
        sta $d001              ; Sprite 0 Y position

        ; Handle X MSB if needed (for X > 255)
        lda sprite_x
        cmp #255
        bcc no_msb

        ; Set X MSB
        lda $d010
        ora #$01
        sta $d010
        jmp msb_done

no_msb:
        ; Clear X MSB
        lda $d010
        and #$fe
        sta $d010

msb_done:
        rts
Magic Moment: The VIC-II chip instantly moves your sprite to the new position!
Step 5: The Interactive Loop
“This is how we create continuous responsiveness!”
game_loop:
        jsr read_joystick          ; Capture your input
        jsr move_sprite            ; Calculate movement
        jsr update_sprite_position ; Make it visible
        jsr wait_frame             ; Perfect timing
        jmp game_loop              ; Continue forever
Magic Moment: Your sprite now responds to your every move in real-time!
Create Your Interactive Experience
Now it’s your turn to feel the magic of interactive control!
Build Your Responsive Sprite
- Create the program: All code is in
pixel-patrol-04.asm - Build it: Run
make clean && make all - Experience the magic: Execute
make run
Expected Wonder
When you run this program, prepare to experience:
- Instant response: Your sprite moves the moment you touch the joystick
- Smooth movement: 2 pixels per frame creates perfect fluidity
- Total control: Move in any direction, stop instantly
- Pure joy: The incredible feeling of “I’m controlling this!”
The Magic Behind the Movement
Why This Feels So Responsive
“This is real-time programming at its finest!”
Your movement system is:
- Immediate: No delay between input and response
- Smooth: Consistent 2-pixel movement per frame
- Precise: Direct pixel-level positioning
- Continuous: Moves while you hold the joystick
- Intuitive: Natural directional mapping
The Technical Beauty
What you’ve created is a real-time system:
- 50 times per second: Your loop runs at 50Hz (PAL)
- Zero lag: Hardware-level input reading
- Perfect timing: Synchronized with the display
- Responsive control: The hallmark of great games
Make It Even More Amazing
Ready to enhance your interactive experience?
Challenge 1: Speed Control
Wonder Goal: “I can make it faster or slower!”
Change the movement speed:
sbc #1                 ; Slower (1 pixel per frame)
sbc #3                 ; Faster (3 pixels per frame)
Challenge 2: Diagonal Movement
Wonder Goal: “I can move diagonally!”
Your sprite already supports diagonal movement! Try holding Up+Right or Down+Left simultaneously.
Challenge 3: Visual Feedback
Wonder Goal: “I can see when I’m moving!”
Add border color changes:
; In move_sprite, add:
lda #$02               ; Red border when moving
sta $d020
What You’ve Achieved
🎉 Congratulations! You’ve mastered interactive sprite control!
The Magic You Conquered
- ✨ Real-time input - You read hardware directly
- ✨ Responsive movement - Your sprite obeys instantly
- ✨ Smooth animation - Perfect pixel-level control
- ✨ Interactive programming - Code that responds to you
- ✨ Game control foundations - The basis of all interactive games
Your Programming Journey
You’ve just crossed a major milestone! You’ve created a real-time interactive system - the foundation of every video game ever made. This is the moment when programming becomes truly exciting!
Historical Achievement
You’ve just implemented the same control system used in countless classic C64 games:
- Jumpman - Platform game character control
- Impossible Mission - Smooth character movement
- Paradroid - Robot control and movement
- Summer Games - Athletic character control
Modern Relevance
The concepts you learned today power:
- Game engines - Unity, Unreal Engine input systems
- VR/AR applications - Motion tracking and response
- Interactive interfaces - Touch and gesture control
- Real-time systems - Any system that responds to user input
What’s Next?
“Ready to organize your movement into a logical grid?”
In the next lesson, you’ll discover how to add a grid position system to your sprite movement. This will let you track both the smooth pixel position AND the logical grid position - the foundation for game mechanics like collision detection and level design!
Coming Up
- Create an 8×6 grid overlay system
- Track both pixel and grid positions simultaneously
- Calculate grid position from pixel position
- Display your current grid coordinates
- Set up the foundation for grid-based game logic
You’re about to learn how professional games organize movement into logical, game-friendly coordinates!
Ready to add intelligence to your movement? Let’s create a grid system!
Technical Reference
CIA Joystick Reading
- $DC00: CIA1 Port A (joystick port 2)
- Active low: 0 = pressed, 1 = not pressed
- Bit mapping: xxxFRLDU (Fire, Right, Left, Down, Up)
Movement Characteristics
- Speed: 2 pixels per frame
- Directions: 4-way movement (8-way with diagonals)
- Response: Immediate (no acceleration)
- Timing: 50Hz update rate (PAL)
Sprite Position Registers
- $D000: Sprite 0 X position (low byte)
- $D001: Sprite 0 Y position
- $D010: Sprite X MSB register (for X > 255)
Movement Variables
- sprite_x: Current X position (0-255+)
- sprite_y: Current Y position (0-255)
- joystick_state: Current input state
This interactive foundation will serve you throughout your entire C64 programming journey!